
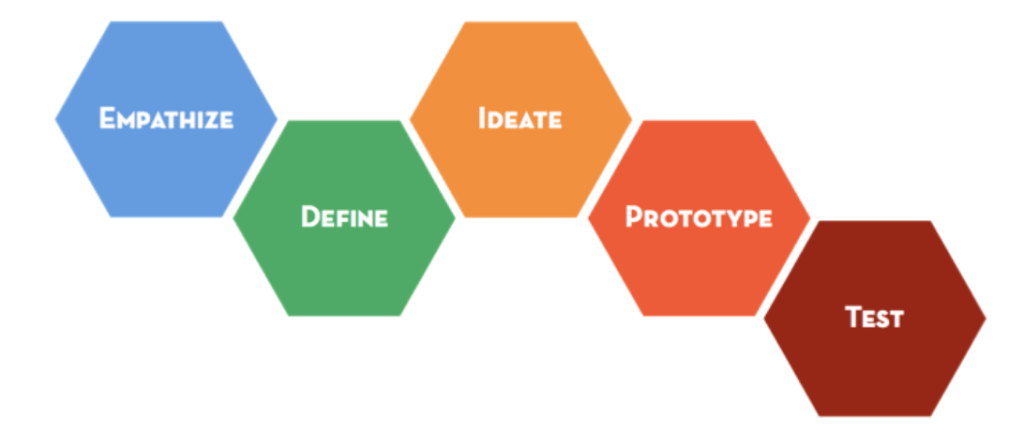
Hasso Platter Institute of Design at Stanford
With pencils, paper, crayons, tape, stickers, play-doh on hand, my partner and I are ready to take on our first Design Thinking crash course. We hit play on the “Stanford Design Thinking Virtual Crash Course” video. This ninety-minute video explains each principle of Design Thinking and prompts us to take on specific challenges. The experience could not have been more immersive and thoroughly enjoyable.
Background
Design Thinking is a human-centered problem-solving methodology. It puts people at the forefront of solving an issue they may have. It is very hands-on and requires you to dig deep into each step. Additionally, the Hasso-Plattner Institute of Design at Stanford (d.school) is the leading university when it comes to teaching Design Thinking. The d.school’s Virtual Crash Course video is a small taste of what they teach in their regular 10-week course. The video assigns each group with the task of creating a new gift-giving experience for their partner. Each individual reflects on the last gift they gave someone. Their partner then begins the Design Process listed below to develop a new gift idea.
My Experience
Step 1: Empathize
Take the time to understand the problem you are trying to solve and gain a deeper understanding. The Crash Course prompted participants to interview their partners about their most recent gift-giving experience. With no time to waste, I started asking any question that came to mind. It is challenging to try to think of questions that you hope would lead you to exciting findings. Thankfully, I was able to run a second interview to dig deeper and learn more about my partner.
Step 2: Define
From the insights gathered during the interview process, it was time to define the core problem. In this stage, it was essential not to put my wishes into the mix but to make it solely about my partner’s needs. I expected this to be far more challenging; thankfully, the d.school provided a fill-in-the-blank template to make the process easy to understand.
Step 3: Ideate
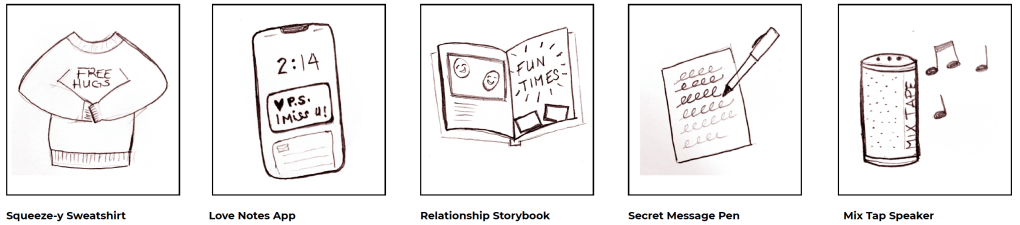
Next, it was time to brainstorm and sketch various solutions to the problem. During this phase, I found it most important to let go of any inhibitions and keep drawing whatever came to mind. I have brainstormed in the past and find it challenging to come up with different ideas, but this step helps stretch your brain to develop ideas you would have never considered. I have found brainstorming to be a place to have fun and put down whatever outlandish thought you may have.
Interestingly, the d.school asked participants to share their ideas with their partners, gain feedback, and sketch more. The extra brainstorming was incredibly helpful. I gained more insight into my partner’s needs and began to feel confident in the solution. I was able to add details to make my idea better.
Step 4: Prototype
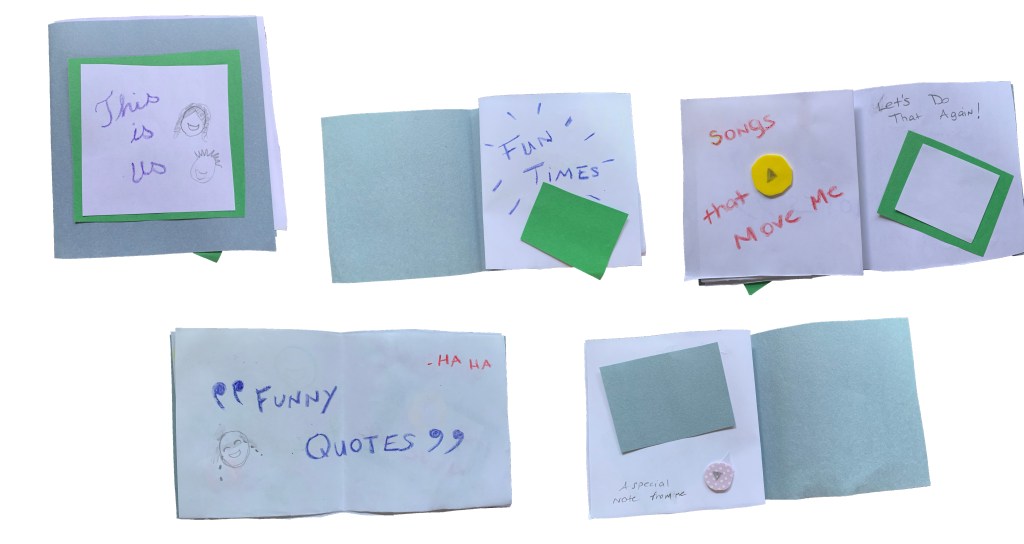
This was my first time creating a prototype, but with only 10 minutes, I had no time to dwell and went for it. During this step, we used our craft supplies to bring our idea to life and build a prototype. Putting together a physical prototype is a whole new ballgame compared to brainstorming. You had to materialize how this idea would function and work through any constraints you may have.
Step 5: Test
In this phase, the participants must share their prototype and get more feedback. It may be considered the last step listed, but it is by no means final. Once I shared my prototype with my partner, she provided suggestions for improvement. I enjoyed hearing what she had to say, and I felt her involvement made for a more robust gift-giving solution. With her feedback, I can go back through the Design-Thinking steps above and keep brainstorming, ideating, prototyping until we agree it’s the best solution.
What I Learned
Overall, I found each step as important as the last because you had to dive deep to see every detail and exhaust all possibilities. Also, the hands-on approach helped me gain a clear understanding of how Design Thinking works. One of the critical pieces throughout the process was getting continuous feedback from my partner. I felt our collaboration made for a fun, unique gift-giving experience that successfully solved my partner’s problem. To see my complete process click here:

 To Mulberry Street Marketing & Design
Leave a comment